Showing posts with label recipe. Show all posts

Tuesday, March 11, 2014

Cookie Butter Swirl Brownies

I bought cookie butter a while ago and it is delicious! After eating it out of the jar on more than one occasion I wanted to try doing something different with it.


I prepared dark chocolate boxed brownie mix with just the one egg to make it extra fudgy.


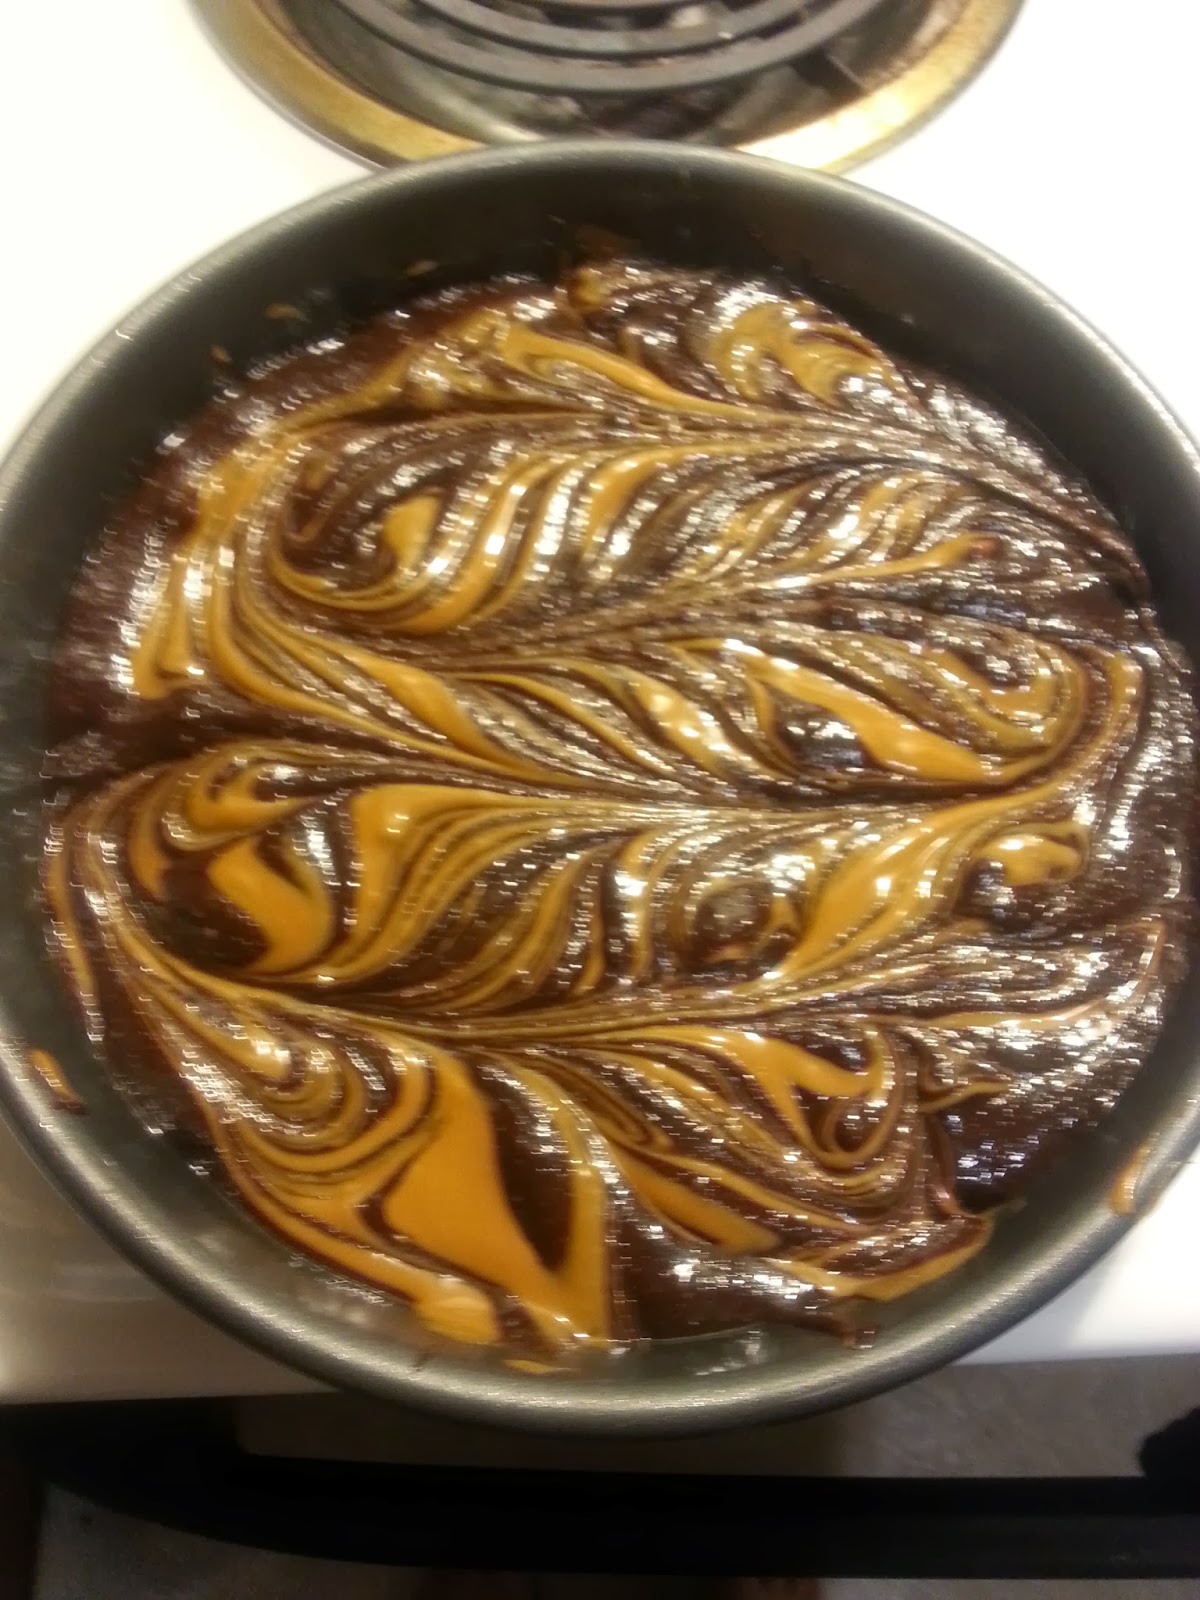
I then added in a few spoonfulls of creamy cookie butter, but it was to thick to swirl the right way as you can see below.


So I placed a few tablespoons of cookie butter into a mug and microwaved for 10 seconds just to make it easier to work with. I spooned this in and then marbled the mixture.


After this is where it all went wrong. I followed the baking instructions on the box and they were perfectly done and smelled delicious...


... until I managed to somehow flip over the pan and drop most of the contents all over my oven.Some of it was salvaged and delicious, but I was still sad. Hopefully the next time it works out a little better and I'm not such a (cookie)butter fingers. They tasted great and the dark chocolate brownie mix worked well with the sweetness of the cookie butter. Try this out for a fun and easy twist on regular brownies and just follow everything but the last step!

Sunday, January 26, 2014

Get Well Soup Recipe

Tis the season for sniffles and sneezes and flus. Sometimes all you need is a nice big bowl of soup to start feeling a bit better. This is a chicken noodle soup that is easy and great at any time, but can really help turn a cold around. It's hearty, but not heavy and there's a little kick of cayenne which can help a stuffy nose to unblock. My boyfriend was home sick for a week with a particularly nasty cold and I made this soup for him and he was able to heat up a bowl as needed, quickly and easily and much better than the stuff from a can. You can double or half the recipe or adjust it as you like very easily. I use boneless, skinless chicken breast because I find it easier to prepare, but my mom uses thighs since she finds them more flavorful. If you are using a bone in meat you may want a little bit more by weight.

~ 2 pounds of chicken, cleaned
2 tbps canola oil
1 small or 1/2 a large yellow onion, diced
3 celery stalks, diced
3 carrots, peeled and sliced
2 boxes chicken broth (you can use any variety you like, low or no sodium, organic, etc.)
Salt and pepper
Ground cayenne pepper, to taste (I use about 1-2 tsp)
Egg noodles

You want to make sure your chicken is cleaned, fat, cartilage and blood vessels removed. Season liberally on both sides with salt and pepper. I sprinkle a little cayenne on only one side, start with just a teaspoon, otherwise it can be overwhelming. You can always add a little to the broth later on.

Heat the oil over medium high heat in a LARGE pot. I cook about 3 breasts at a time so as to not overcrowd the pot. You want them to be golden brown on each side and cooked through. Once cooked remove to a cutting board.


While the chicken is cooking you'll want to prepare the vegetables for the mirepoix (onion, celery and carrot.) If you like more vegetables in your soup, feel free to add more.


Once all the chicken is cooked, add only the onions to the remaining oil in the pan. You don't want to overcook them, just let them sweat a bit and lose some of that bitterness. You can lower the heat to medium low.


In the meantime you want to dice or shred your chicken, it's all about preference. I personally like mine diced.Set the chicken aside.

Next add the celery and carrots to the pot and let them cook for a few minutes, you don't want them super cooked, you just want them to build some flavor.


Add the chicken back in to the pot and then add the broth. Turn the heat back to medium/medium high.


I realized a little too late that my pot was too small for the second box of broth and had to switch, that's why that last picture looks like very little broth.

Let this simmer on medium for about 20 minutes. If you will be serving the entire batch you can then add the noodles and cook for about 7 minutes. However, I don't recommend adding the noodles if you aren't eating it all right away. The noodles will absorb the liquid and end up soggy and the soup will lose a lot of broth.

Here's what I do:

Measure out a serving of noodles into a sauce pan.


Ladle in the desired amount of soup (don't forget your veggies!)
Boil for about 7 minutes (follow package recommendation on the noodles) and serve while still hot.


Enjoy and feel better soon!


Sunday, January 19, 2014

Quick & Easy Quiche Recipe

When I was younger I didn't really care for quiche, what was wrong with me?! I love quiche now, it's great for breakfast, brunch, lunch and even dinner. I have a tried and true recipe for quiche that works well for appetizer or full sized quiche, but it had a fattening and a bit time consuming crust. So I fooled around in the kitchen for a bit and ended up trying it with crescent rolls... and it worked!

The wonderful thing about quiche is you can put just about any combination of things in it and it always turns out great. Quiche is a wonderful opportunity to use up leftovers. For example if you make a roast chicken and have carved up the odds and ends pieces, you can dice a vegetable and toss in a little cheese and you've got a quiche! I happen to love a ham and cheese quiche and it was what I had on hand so it's what I made, but you can get creative!

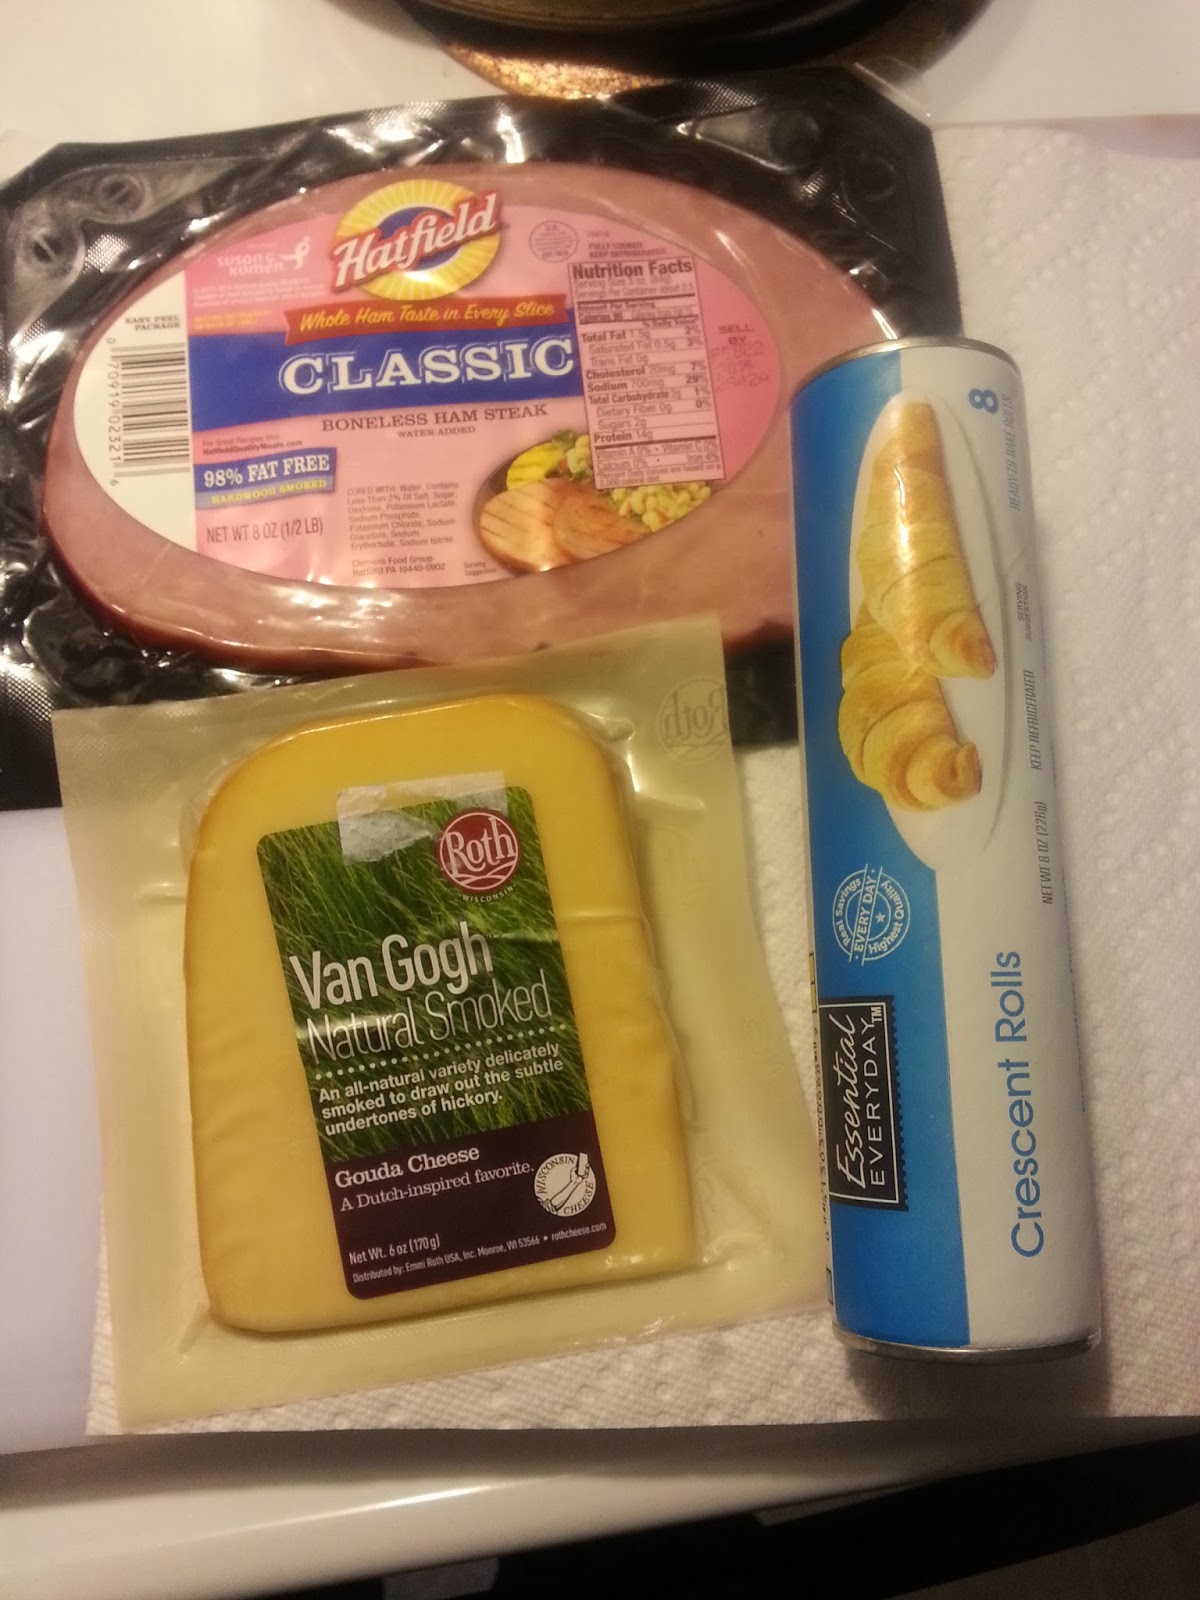
8 oz ham, diced
6 oz gouda cheese, diced
dried oregano to taste
salt and pepper
1 tube crescent rolls
1/2 - 1 cup milk*
1-2 eggs*


Preheat your oven to 350F. I use a shallow pie dish for my quiche and just grease it lightly with some cooking spray.


Next you want to unroll the crescent rolls and place them into the dish with the pointed ends in the center. There will be a little room between them, just try to keep them evenly spaced. Your then going to use your fingers to press the seams together, if you end up with a little extra in the middle like I did, you can use it as "glue" in other spots.

Next you are going to add your filling, again I used ham steak and gouda cheese, but you can use what you like. I use a little salt and pepper and about a half tablespoon of dried oregano. Make sure to spread the filling out evenly.


 In the ingredients I noted 1/2 to 1 cup of milk and 1 to 2 eggs. If you are making mini quiche or if you have a lot of filling, you might only need 1 egg and 1/2 cup milk, however, in a less crowded quiche and many times in a full size quiche you will need 2 eggs and 1 cup milk. These should be beaten together and poured evenly into the quiche. I suggest starting with the 1 egg and 1/2 cup of milk and adding more if necessary. 


Now you'll want to put your quiche in the over for 30-45 minutes. Keep an eye on it around the 30 minute mark. I like my edges a little more browned, but if you like a lighter colored crust you may want to use a pie guard or a bit of foil around the edges to prevent over browning. The time will also vary depending on your oven and the amount of filling. The quiche should be golden and the egg should be settled and solid. Remove from the oven and allow to cool for a few minutes before cutting to serve.

This is a recipe that reheats very well and is great for brunch or an easy dinner. Remember to get creative and use what you have. Another favorite quiche of mine is chicken and red peppers and a little cheese.

What do you like in your quiche?

Friday, January 10, 2014

Quick & Easy Dinner: Tilapia with Pepper and Artichoke Bruschetta

So you read that title and it sounds like a ton of work right? Wrong. I made this not that long ago when I wasn't feeling well and it was a huge hit. It literally took me 15 minutes. I was sent a sample of Dipin Natural Dips in the Pepper and Artichoke Bruschetta. I thought about using it either as a dip or as a bruschetta and then this idea dawned on me. I had some tilapia and it can be a pretty bland fish, so I thought this would really jazz it up. I salted and peppered the fillets liberally and just pan seared them with a little olive oil. I made some rice as a side. With the fish hot out of the pan I spooned some of the bruschetta over it and voila, instant pizzazz! It was a huge hit and thankfully not much work and I was able to get my sick butt back in bed. I think their bruschetta (and probably their tapenade too) would work great for lots of other dishes, chicken and other fishes definitely come to mind.

Have you tried these dips before? What did you think?


Thursday, November 28, 2013

Happy Thanksgiving! Recipes and Tips!

Happy Thanksgiving (and Hanukkah) to all of you! I'm grateful for all of you! I know it's a little late, but I figured I'd share my turkey day tips and recipes.

First things first, make sure your bird has had about 3 days to defrost.
Make sure you clean your bird well. Remove excess fat and skin, remove gizzards and neck. Some people make these on the side, but you don't want them inside the bird.
I started brining my turkey about 4 years ago and what a difference it makes! I use Alton Brown's recipe, except for the candied ginger since I never seem to have any on hand. I give it 24 to 36 hours and make sure to flip it. This extra step of brining is so worth it at the end when you have an ultra moist turkey.
I highly recommend some aromatics in the cavity of the bird. I often use an apple and an onion and some herbs, usually rosemary. You can use any combination you like, this just happens to be my favorite.

Last year I also started trussing the turkey, it really isn't as hard as it seems and Alton Brown comes to the rescue again with a great video on how to, however at the start of the video he says he has 12 feet of rope/twine and you really don't need that much. However, it is better to have some extra you can trim off than to come up short and have to redo the whole thing. Trussing has two main benefits. Firstly, you get a classically "nicer" looking turkey with all the limbs where they ought to be. Secondly, you get more even cooking. Larger parts like the breast are still fully exposed, but wings and drumsticks are tucked a little closer to the body and so they won't be overcooked by the time the breast is done. This also helps to keep the meat from drying out in those places.

To get a nice crispy skin, you can brush the whole turkey with little canola or vegetable oil. Personally I love butter, so I rub the skin with a little butter and also tuck some under the skin. I think butter gives it such a nice flavor, but you still get the crispiness of the skin.

A few extra unnecessary steps I usually do. I like to use a flavor injector to flavor the meat a little more. You can use anything from stocks to juices. I like it, but after brining and aromatics you don't necessarily need to do this. I also like to make a spice mix that I rub onto or under the skin. Usually some ground sage and rosemary with salt and pepper and sometimes a little garlic powder and a pinch of cayenne. Really, if you're going to do this step, you can do whatever your heart desires. Feel free to experiment with spices and herbs you like.

There's a debate between whether it's best to brown the skin at the beginning or the end of cooking. I usually save it for the end and have had good results, but I've also done the browning at the beginning once or twice. I usually use a covered pan or aluminum foil to help keep some of the moisture in.

I NEVER put the stuffing into the bird, in my house we've always made it separately. There are a few reasons. The stuffing can end up over or under cooked and comes into contact with raw turkey and that can be problematic. It's also much messier when serving and transporting to the table. It's just easier and safer to make it separately.

New to making Thanksgiving dinner or only cooking for a few people? Save yourself a lot of trouble and make a turkey breast. You can do a lot with a turkey breast and it can be a lot less work, especially for the first timer. You'll have less mess and trouble and equally good results. Plus you won't have mountains of leftovers.You can also do a potluck to help take some of the stress off. My mom always makes the stuffing and I do the turkey. It helps to take a little stress off. Click here for my mom's homemade stuffing recipe.

Have a Happy Thanksgiving! Hope these tips make it easier for you! Please share your tips, tricks, and recipes in the comments below.


Mom's Homemade Stuffing Recipe

My mother makes this stuffing recipe every year and she's letting me share it with all of you. This recipe makes a very full 13x9 pan. Also, fair warning, this is one of those recipes where much is by eye or approximated, so together we tried to pin it down into a written recipe.

What you need:
3 loaves of stuffing bread, torn into approximately 1 inch pieces
4-6 large eggs, see note in recipe
1 pound of ground Portuguese chourico or linguica, not Spanish chorizo, can be cooked before hand.
Bell seasoning, 2-3 tbsp to taste
1 large onion, chopped
Celery, chopped, 4-6 stalks, to taste
1 tbsp ground red Portuguese pepper (not the dried flakes, this is found in glass jars)
1 stick of butter, softened
Milk, enough to moisten, but not soak the mixture. 1-2 cups 
Optional: 4-6 ounces lightly toasted pine nuts
Optional: add 1 pound of cooked ground beef, drained
Optional: 1/2 cup of dried cranberries or raisins


Mix all ingredients in a large bowl. Make sure meats have cooled before mixing. For the eggs and milk, start with less and add more as needed. The mixture should be sticky enough to hold together, but not soggy. Hands are the best tools for mixing everything together. Once thoroughly incorporated, transfer to a 13x9 pan and cover with foil. Bake at 350 degrees for 45 minutes and then uncover for the last 15 minutes. It should be golden brown, but not overly dried. Enjoy!

Sunday, October 6, 2013

Fall Recipes: Apple Sauce

Call me blasphemous, but I don't love pumpkins. I know, I know, every New Englander is supposed to love pumpkin everything, I don't, sorry. For me, Fall is all about apples. Apple pie, apple cider, apple sauce, YUM! My best friend recently made me homemade applesauce and it was amazing, I couldn't believe how easy it was to make so I asked if I could share the recipe. Here it is!

I eat a lot of applesauce so I doubled it, it works just as well, but below is the original. I used gala apples, but I think any red apple will work well.

4 apples peeled, cored and chopped
3/4 cup water
1/4 white granulated sugar
1/2 tsp ground cinnamon

Combine all ingredients in a saucepan and cover. Cook over medium for 20 minutes or until apples are tender. Remove from heat and mash with potato masher or fork (or if you're like me, a whisk) until at the desired consistency. I like mine a little chunky so I don't mash it long, you can make it smoother if you like.


Thursday, January 10, 2013

Blog Update: New Features

Hey guys, so as you know I'm in the middle of moving. Oh, the fabulous confusion of living in a forest of cardboard boxes... Anyway, this has made it a little bit hard to keep up with one of my New Year's resolutions, a new recipe every week. If you've read the About Me post, you know that my current kitchen is a makeshift shamble of a plug in 2 burner unit and a toaster oven that's pretty much a grown up Easy Bake Oven. In order to make it up to myself and to you guys, once I'm fully moved in I'm going to do one week of a new recipe every day. If there's a certain kind of recipe you guys want to see, let me know in the comments below. After that I'll pick a day of the week that will be home to the new recipe each week. The other new thing I want to feature is a Fashion Friday post. At my main job I wear scrubs every day so I don't get to showcase any of my fabulous clothes and accessories. I convinced the big boss (a.k.a. my mom, yes it's a family business) that we should have a dress down day. Her response? No, but we could have a dress UP day. Even better. So I'm going to try to do an OOTD/OOTW on here.

If there's something you guys want to see, let me know in the comments. 


What new feature do you want to see on Gorgeous, Cupcake?

Wednesday, November 7, 2012

Cupcake Martini Attempt #1

So remember that part where I mentioned I love cupcakes? For those who know me that's pretty much a daily basis. Anyway, once upon a birthday someone ordered me a birthday cake martini and it was scrumptious. The waitress told me that they blended vanilla ice cream and vodka and voila it was delicious. Well there was definitely some kind of witchcraft behind it that I can't seem to get right. I have found tons of recipes online for different cake martinis. Cupcake, birthday cake, pineapple upside down cake, but none of them call for ice cream. So I did what any crazy person would do. I went out and bought Pinnacle Cake Vodka, Breyer's Extra Creamy Vanilla ice cream, Duncan Hines frosting, and some colorful nonpareils... oh yes my friends, it's a party. I managed to figure out how to rim a martini glass in frosting and coat it with nonpareils. I thought it would be no big deal, but I won't lie, it took about 10 minutes and I ate more frosting than I got on the glass. I thought the next part would be easy. I measured out a shot of vodka and got myself a scoop of ice cream and threw them both in the blender. This is the part where I would like to say I enjoyed a deliciously creamy martini. The ice cream just keep getting spun around the blender and the vodka just kind of mixed with the melted ice cream. They just would not come together and be friends. I tried adding a little more softened ice cream and only made a bigger mess. When enough of this frankentini had melted I managed to somewhat blend and pour the whole atrocity into my beautifully rimmed glass. I tried to drink it, the rim was delicious, but that was not a martini. It did not taste like cake or vodka or ice cream. I managed to ruin 3 different delicious things. I'm still trying to figure out how on earth to make this silly thing, but it is just not happening.

Any bartenders out there who can suggest any tips or tricks or who want to come whip me up one? Anyone?

I'll probably give this another go soon.

Have you ever royally messed up a recipe you thought was foolproof? Tell me below.